


Table of Content
In this series of articles, we’ll explore what React Native is, why it is relevant for developing cross-platform native applications, and also use it to create a small but useful app. I hope you will join me on this journey to lean a bit more about React Native.
React Native Tutorial Overview
We live in a world where mobile devices are widespread and two platforms, iOS and Android, dominate the market and the heart of users.
Building a mobile application is not an easy engineering feat—not only does it involve programming on a specific platform, but also designing the application and making sure it performs to what users have become accustomed to expect—which are fast, responsive and good looking apps—is a daunting and challenging endeavor.
When React Native was announced, the overall reactions from the developer community worldwide were overwhelmingly positive. The web is a great canvas and platform, which enables awesome user interactions and experiences, by leveraging HTML, CSS, and JavaScript—so, when developers heard that they could use their existing web skills to develop mobile apps, powered by a leading framework like React, instantly everyone became excited.
Traditionally, when we think about web technologies with mobile platforms, names like Apache Cordova jump to mind—which allows us to package websites or web apps as applications for mobile platforms. React Native is different—as it simply doesn’t package a web app to run on a mobile platform, but instead produces a native rendered app for that platform.
When targeting iOS developers write code using Objective-C or Swift and, for Android, they will find themselves using Java or most recently Kotlin—these are respectively the native languages on each platform. Apart from the differences between the programming languages used to create mobile apps that can run on each of these two platforms, the toolchains are entirely different for both — which adds another layer of complexity and skillset required to target both platforms.
Many modern-day developers use a core set of technologies and languages that are used to build web applications: HTML, CSS, and JavaScript—and they also usually rely on a framework—such as React, Angular or Vue.
React Native Alternatives
React Native falls under a category commonly known as hybrid application frameworks — which allows the usage of the same source code for developing an application for both the iOS and Android platforms. Xamarin from Microsoft and Google’s Flutter also fall into this category.
In recent years, hybrid frameworks have evolved from being simply web views, to use native APIs, by not only allowing developers to reuse most of their existing skills but also allowing them to produce apps that are native in performance and behavior.
React Native is a relatively recent technology—officially available since March 2015, having been in private beta since the start of that year, and internally used at Facebook for a while before that.
In a world where web technologies evolve at breathtaking speed, where the attention to the latest framework shifts quickly—with packages, libraries, and tools coming out every other day, developers tend to become quite skeptical and don’t want to jump on every hype, to avoid ending up in a vendor lock-in scenario.
Why React Native?
You might be wondering—what is so special about React Native and why is it a technology worthwhile learning and getting into?
When talking about web technologies and how they operate and behave on mobile devices, available solutions usually fall in one of the following categories:
Packaging the web app in a mobile web browser: Essentially, the web application lives in a mobile browser, typically called a WebView. Without any major code change or refactoring, a website or web application works on the mobile device the same it would on the web. While this approach can reduce development time, it frequently produces an application that is slower and doesn’t feel native.
Compiling to the app to native code for a specific platform: This takes place by transforming the original source code into another programming language, which is native to the platform. This approach improves performance since you are running native code through an abstraction layer. Unfortunately, this abstraction layer introduces some uncertainties. Considering how much different the next version of the mobile operating system update could be, this could mean breaking the existing code or functionality.
Implementing the app with a JavaScript layer: The JavaScript engine of the mobile environment executes the JavaScript code—which is where React Native resides. To better understand this, let’s look at the following diagram:
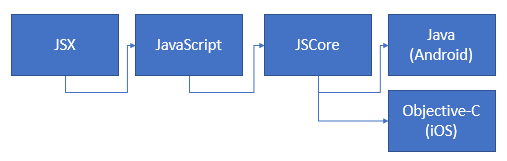
React’s JSX code gets compiled into JavaScript, which then gets executed by the JavaScriptCore (JSCore) engine, and native components are rendered, using UIView in Objective-C (on iOS) and View in Java (on Android).
JSCore is the default JavaScript engine on iOS. This is also the JavaScript engine used by the Safari browser.
These features are great, however, the biggest advantage of React Native is the React framework itself, which is not only efficient and works remarkably well, but also provides developers a great and productive development experience.
What We Will Build
Throughout this series of articles, we will build a React Native app that contains a list of documents that have an expiry date—think of tracking the expiry dates for important personal documents, such as passports, drivers licenses, and credit cards—this way you’ll be able to remember with enough time when you need to renew them.
React Native Install
In order to get started, we’ll need to install an NPM package called create-react-native-app, but before we can do that, we need to have Node.js installed. If you don’t have Node.js installed, go to their website and download the Long-Term Support (LTS) version and follow the installation steps.
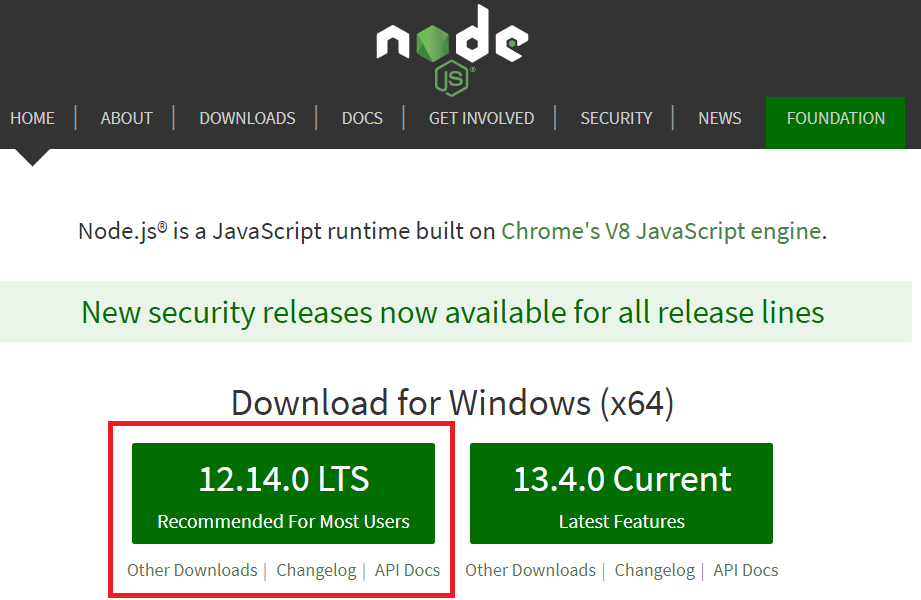
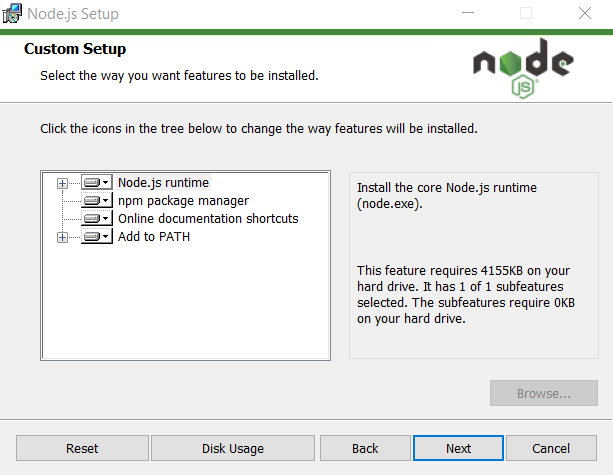
The installation of Node.js is very simple and consists of a few steps which can be easily executed using the intuitive step-by-step wizard. Below an example of the installation process.
I’m using a Windows 10 machine, so I’ll be using Visual Studio Code as my editor of choice, however, you can follow along with Atom, Sublime Text or any other editor.
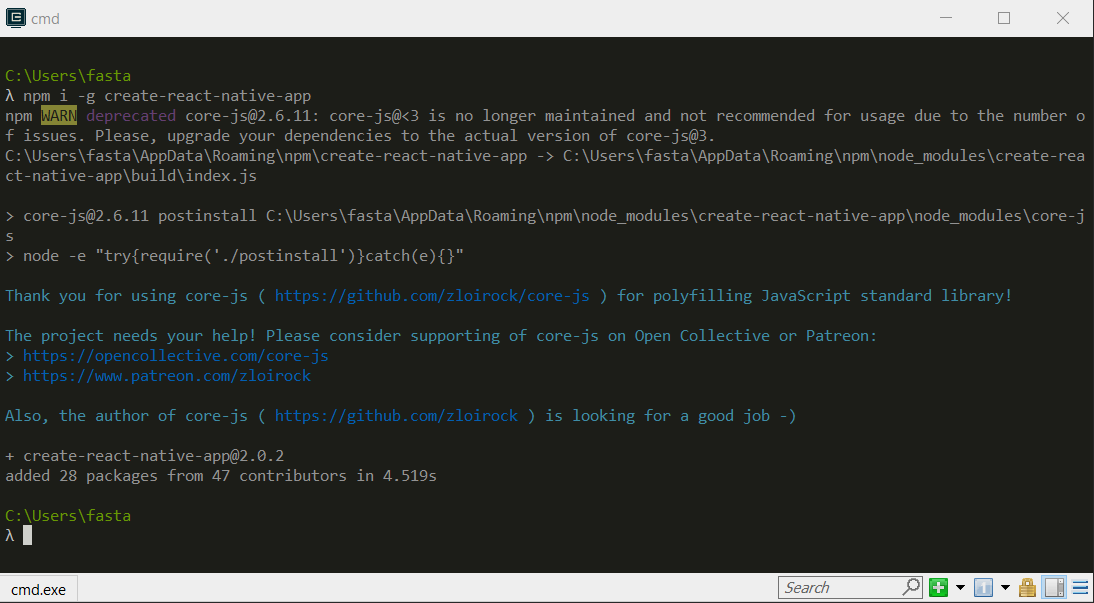
With Node.js installed, open your command prompt or terminal and type in the following command to install the create-react-native-app package.
npm i -g create-react-native-app |
This is how it looks on my machine after the package has been installed.
Awesome—we are now ready to scaffold our React Native App—which is what we’ll do next.
Scaffolding the App
To scaffold and create our React Native application, you’ll need to run the following command from the command prompt or terminal.
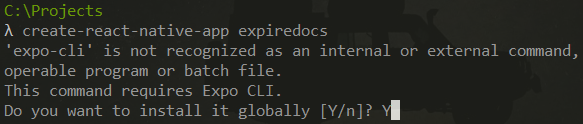
create-react-native-app expiredocs |
When you run this command, you’ll be shown a message saying that the expo-cli is not a recognized internal or external command.
The Expo CLI is a Command-Line Interface application that is the main interface between the developer and Expo.
Expo is used for a variety of tasks, such as creating new projects, developing your app, running the project server, viewing logs, and most importantly, opening your app in a mobile device simulator.
To install it globally on your machine (so, more than one user can use it), when prompted, choose the Y option and press Enter. Below is how it looks on my machine.
Alternatively, you can also install the Expo CLI using the following NPM command with its corresponding parameters.
npm install expo-cli –global |
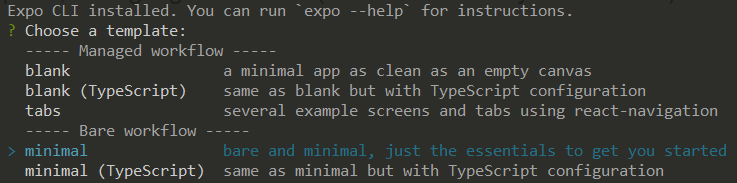
Notice that once the Expo CLI has been installed, the create-react-native-app script will ask you which workflow template you would like to use.
Let’s select the minimal option, as highlighted below (use the arrow keys to select it). This will create a React Native app template with the essentials to get started.
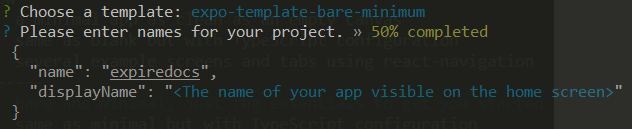
Once you’ve done that, you’ll be requested to choose the app’s display name (displayName)—which we can see as follows (use the arrow keys to choose the option).
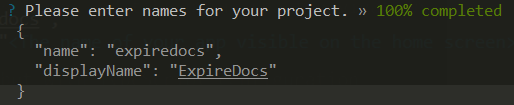
In my case, I’ve entered ExpireDocs as the displayName.
Once done, press Enter, so the scaffolding process can continue and the remaining dependencies can be installed. This is how the process looks on my machine.

When the dependencies have been installed, you should see an output similar to the following one.
Before we execute any further commands, there are a few things we need to be aware of.
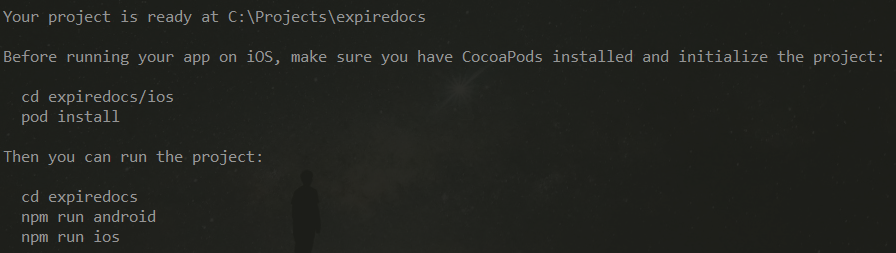
If you want to target iOS, you’ll need to follow along with a Mac. In that case, you’ll need to install CocoaPods on macOS. CocoaPods is a dependency manager for Swift and Objective-C.
I’m on a Windows machine and I’ll be targeting Android as my platform of choice, so I’ll skip this step.
In any case, the code we’ll be writing will be cross-platform and deployable to iOS. Apple only allows apps that target iOS to be compiled using a Mac.
Running the App for the First Time
Given that right now we don’t have any emulators installed, we need to run the basic app that we’ve now scaffolded with the web option.
Go to your project folder, in my case, it’s C:\Projects\expiredocs and set this folder as your working directory with Visual Studio (VS) Code. To do this, run VS Code by typing the following command from the terminal.
code . |
This will automatically set your project working folder and you’ll be able to see the files that were generated when the app was scaffolded.
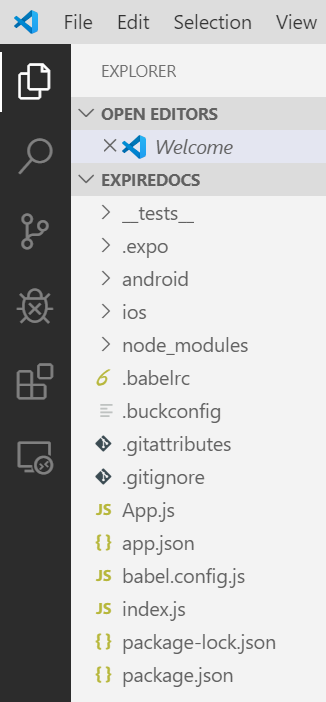
Now, open the package.json file, to check what other NPM commands we have available to run our application, as we don’t have an emulator yet.
Below are the commands available to us—notice that there’s a web command, and that’s exactly what we’ll be using for now.
"scripts":{
	"postinstall": "jetify",
	"android": "react-native run-android",
	"ios": "react-native ruin-ios",
	"web": "expo start --web",
	"start": "react-native start",
	"test": "jest"
},
So, to run the scaffolded app for the first time, let’s execute the following command.
npm run web |
This command will execute the Expo DevTools and bundle up the app so it can be rendered in the browser. We can see the process below.
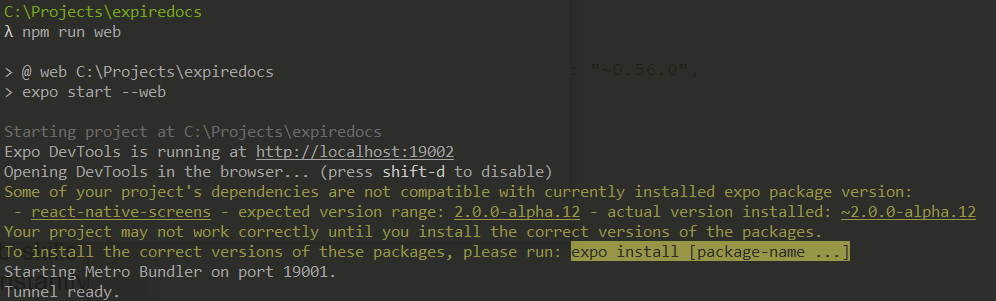
Then, a browser window will open—with the URL mentioned in the command line output above, in my case http://localhost:19002. We’ll see the application running as follows.

Cool — we’ve just managed to run what will become our finished app for the first time! In the next article, we’ll explore how we can start adding React components to give shape to our application — stay tuned.


0 Comments